This is “Plan and Design Your App”, section 4.4 from the book Designing Business Information Systems: Apps, Websites, and More (v. 1.0). For details on it (including licensing), click here.
For more information on the source of this book, or why it is available for free, please see the project's home page. You can browse or download additional books there. To download a .zip file containing this book to use offline, simply click here.


4.4 Plan and Design Your App
Learning Objectives
- Brainstorm an app that solves a business problem
- Identify and describe a target market for an app
- Create process flows that will help you plan your app.
- Mockup an iPhone app using the MockApp.com template
Analyze the Problem
Your app needs to solve a business problem for someone in order to be marketable. For the sake of this lesson, your classmates compose your target market—people like you.
You are asked to identify a problem then describe how your app will solve the problem. Your app should provide some tangible benefits for the target market.
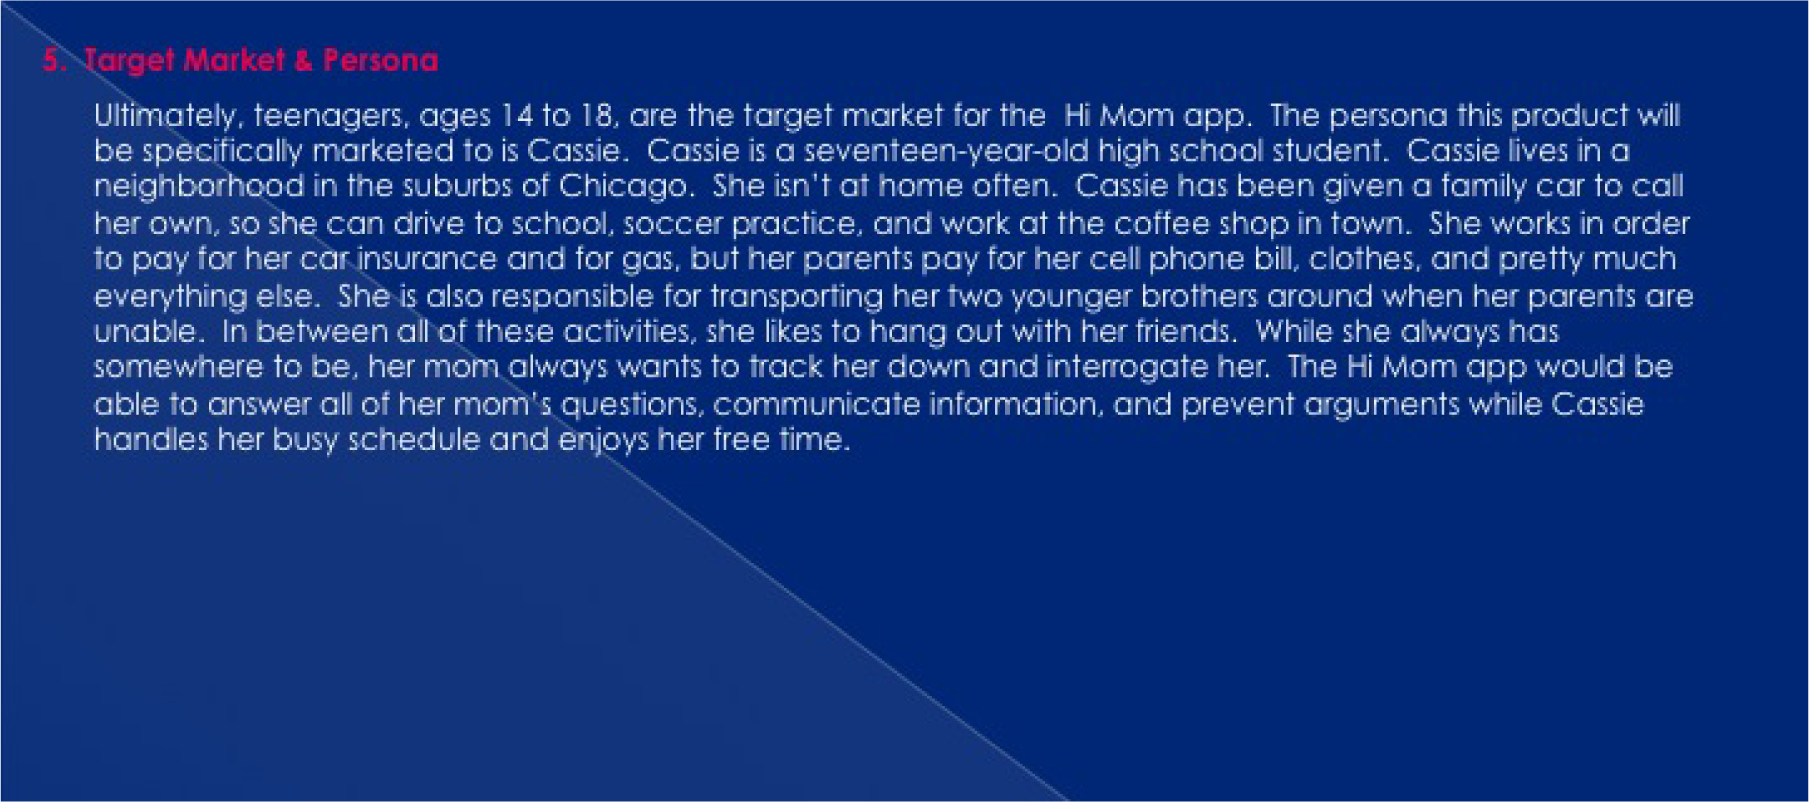
Finally, you are asked to describe a fictional persona in the target market. Having a persona helps you make decisions in the design of the app.

Analyzing the problem and describing the marketability of the Hi Mom app. This app is designed to ease Mom’s worries while giving the student more free time. You should make your own original example.
Define Requirements with Process Flows
After analyzing the business problem, you need to set requirements for the design of your app. We will envision requirements using process flow diagrams.
Some students struggle with what they should create for their app screens until they do process flows. The key is to construct an app swim lane in the process flow. Then look at the app swim lane of the To-Be process flow to help determine which screens to create. The screens should follow logically by looking at the action the app is taking (e.g. ask user X or show user X). The connection will not necessarily be one screen per action. In fact you may have multiple screens for each action. It depends upon the level of detail in your process flow.
Creating a planning diagram almost always saves time in the end. It is much easier to add, update, and remove actions from a process diagram than it is to add, update, and remove screens from your app.
Process flows also highlight the importance of doing business process management and business process redesign and why business process is so important to information systems.
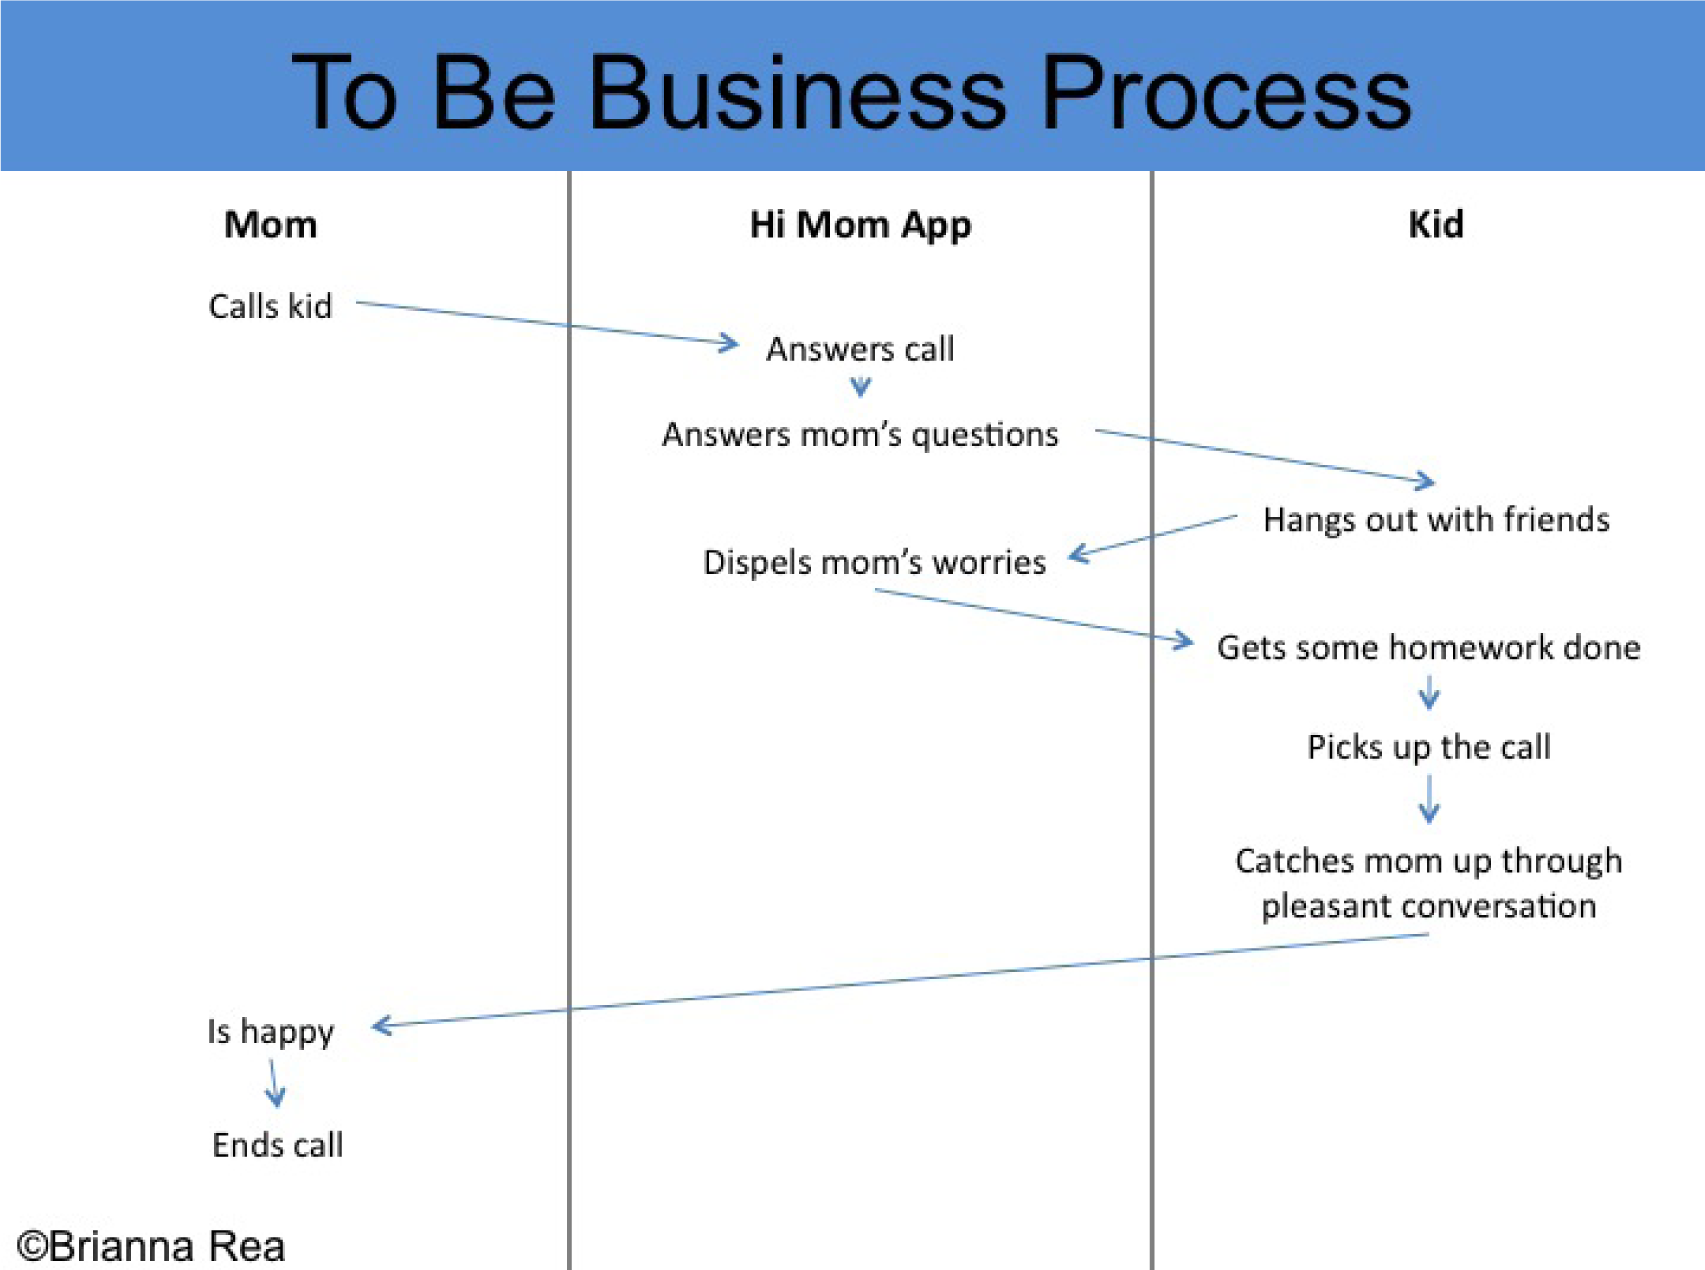
How different will your As-Is and To-Be diagrams be? If you are migrating an existing computerized process to the iPhone, they may be fairly similar. However, if you are comparing a non-computerized process to one that uses an iPhone, then they are likely to be quite different.
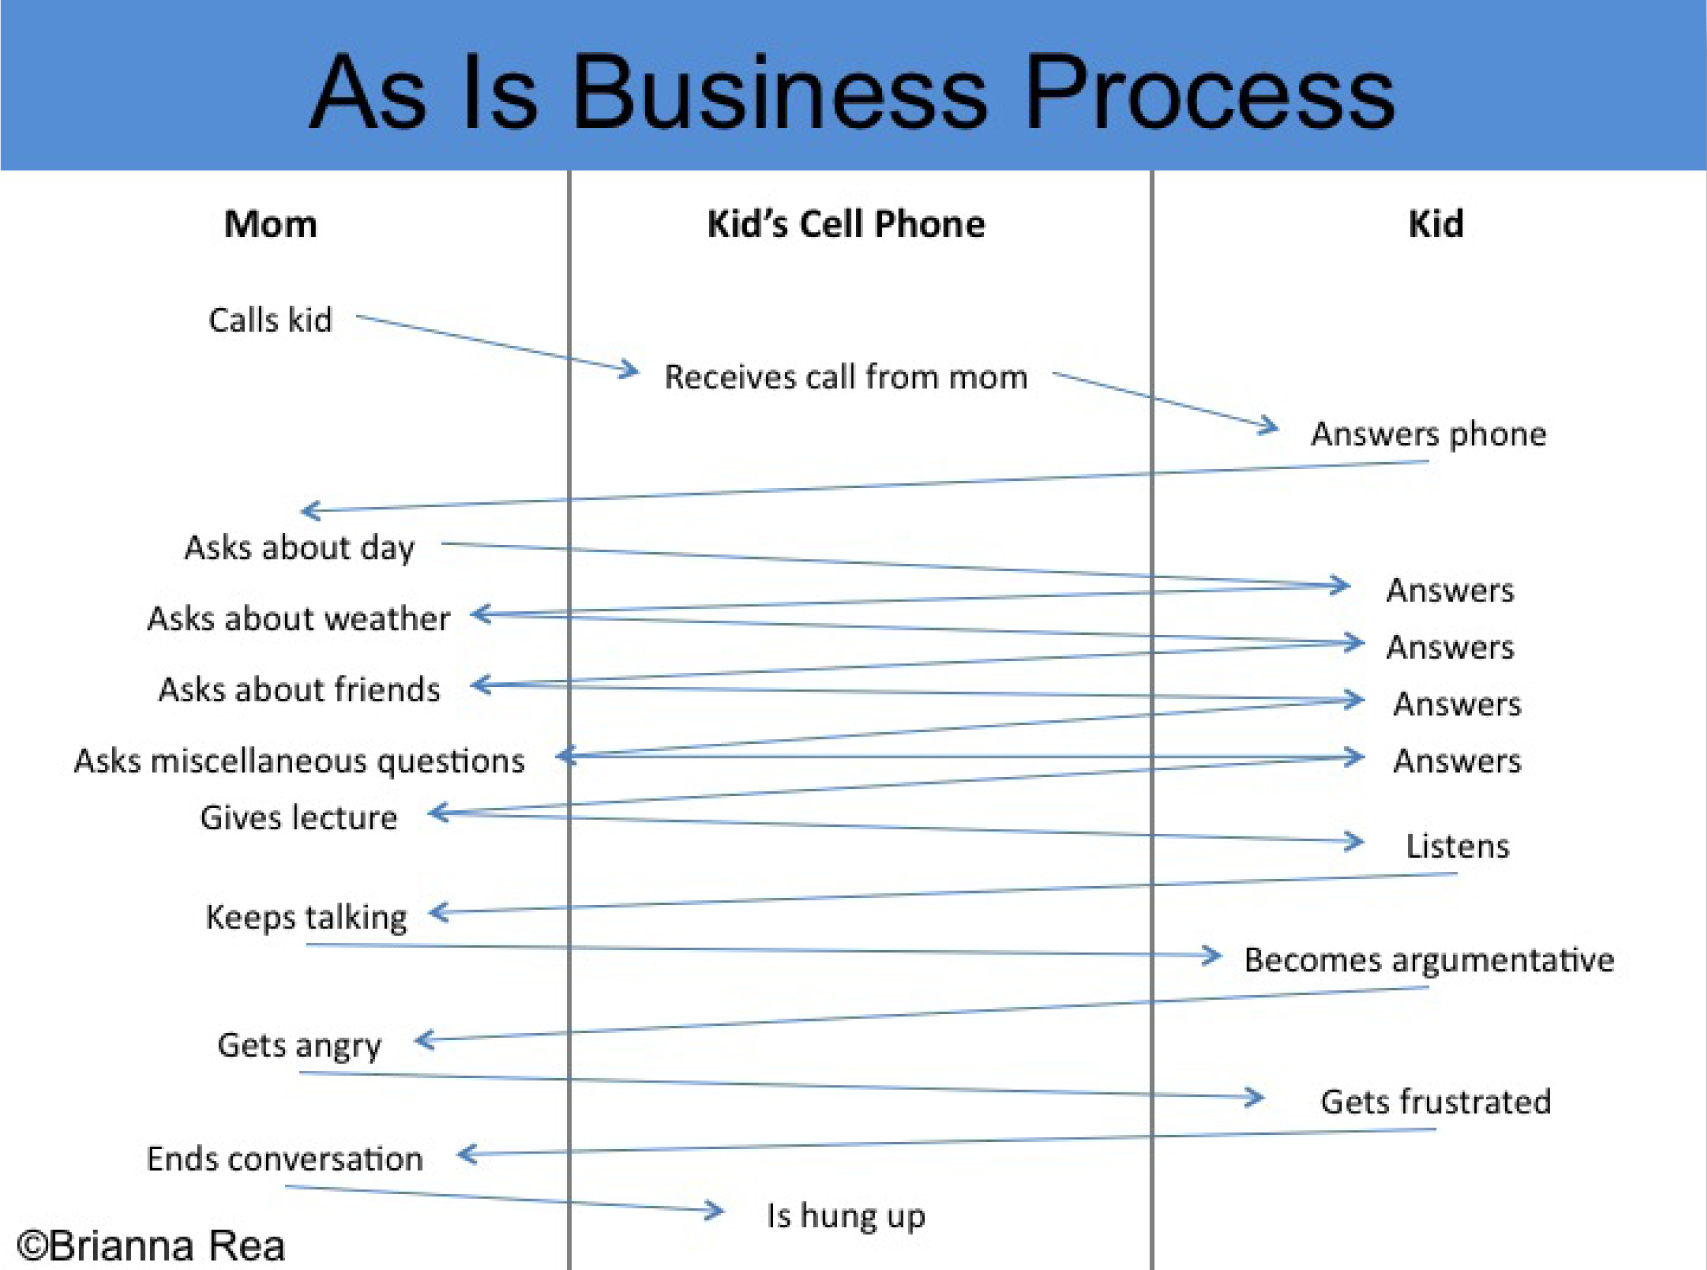
Continuing the analysis (As-Is) and setting the requirements (To-Be) for the Hi Mom app. You should make your own original process flows to match your app.
Design Your App According to Plan
Now that we have discussed target markets, laws of branding, icon design, and process flows, you are ready to design your iPhone app. Your app should have a close relationship with your process flows. In other words, the actions identified for the app in the process flows should be illustrated in the mockups.
Fortunately, the iPhone interface is highly standardized, which means you have fewer decisions to make about the placement and style of interface elements. This allows you to focus more on the content of your app.
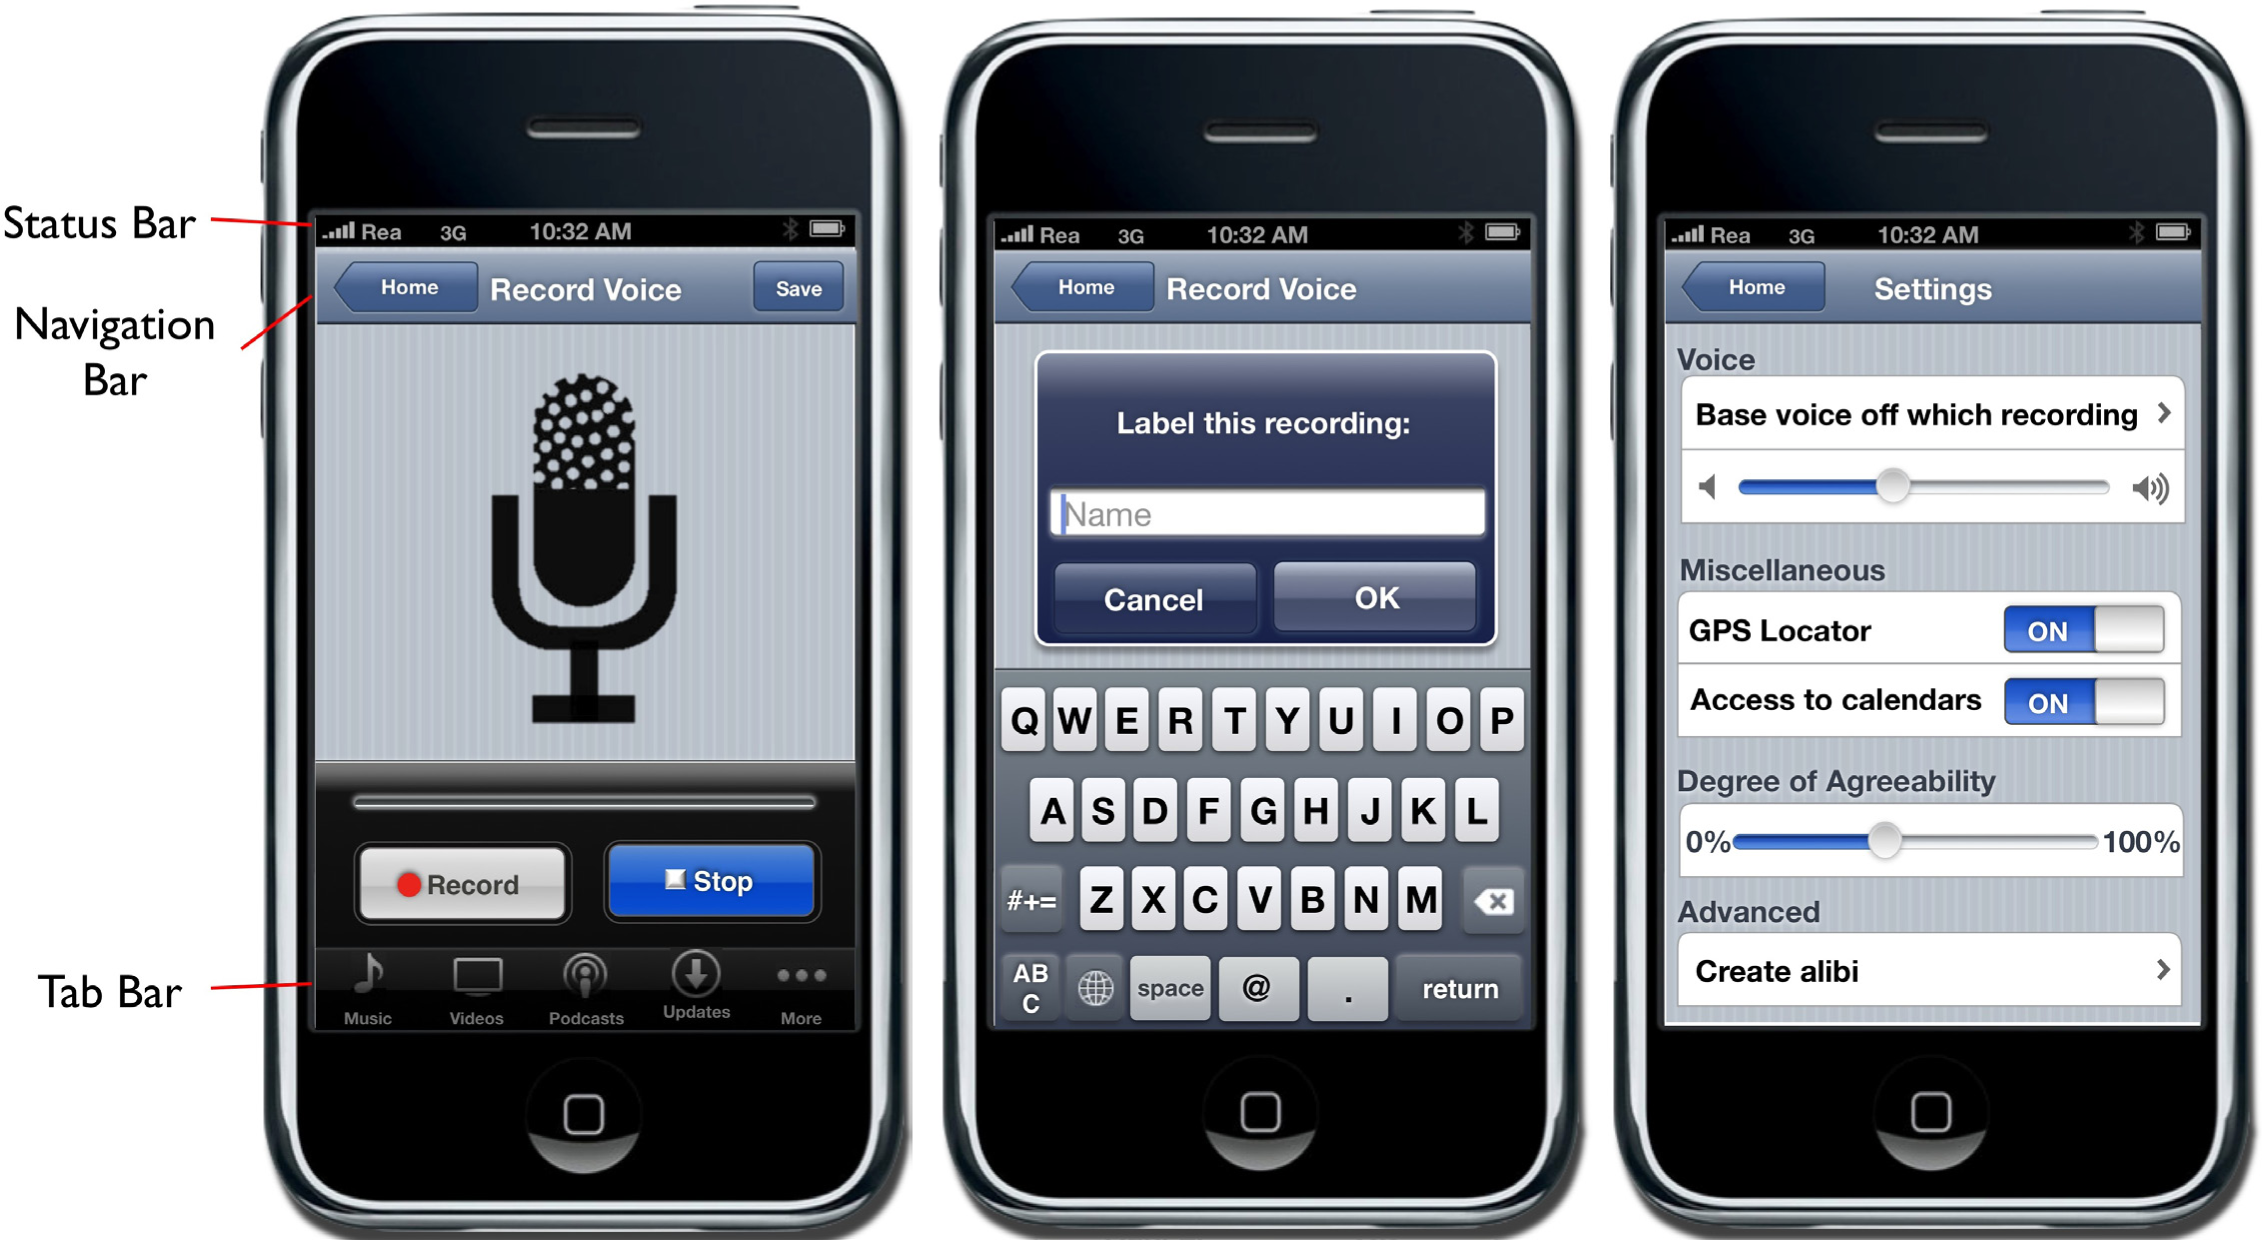
The status bar should appear at the very top of the screen and display important information about the device itself. The status bar displays information such as the current time, battery level, network provider, and network strength.
The navigation bar appears at the top of the screen directly under the status bar and displays the title of the page currently being viewed.
The tab bar always appears at the bottom of the screen and should appear on every screen of your app. The tab bar allows the user to switch modes or views very easily.

Multiple screenshots from the Hi Mom app. You should make your own original screen shots using the MockApp template and library.
The MockApp Template and Library
To create your iPhone app, you need access to all of the screen elements on the iPhone. Fortunately, there is a wonderful PowerPoint template called MockApp, which contains a comprehensive set of iPhone screen elements. MockApp is located at MockApp.com.
When you download MockApp you will have access to two files—a template and a library. The template is simply a series of blank iPhone screens that you populate with the appropriate screen elements from the library.
Your task is to copy screen elements from the library and then paste them into the template. You then rearrange and relabel screen elements to simulate a working app.
Because PowerPoint supports hyperlinks among slides, you can even simulate buttons that navigate among screens in your app. In this manner, you can create a photo realistic mockup.
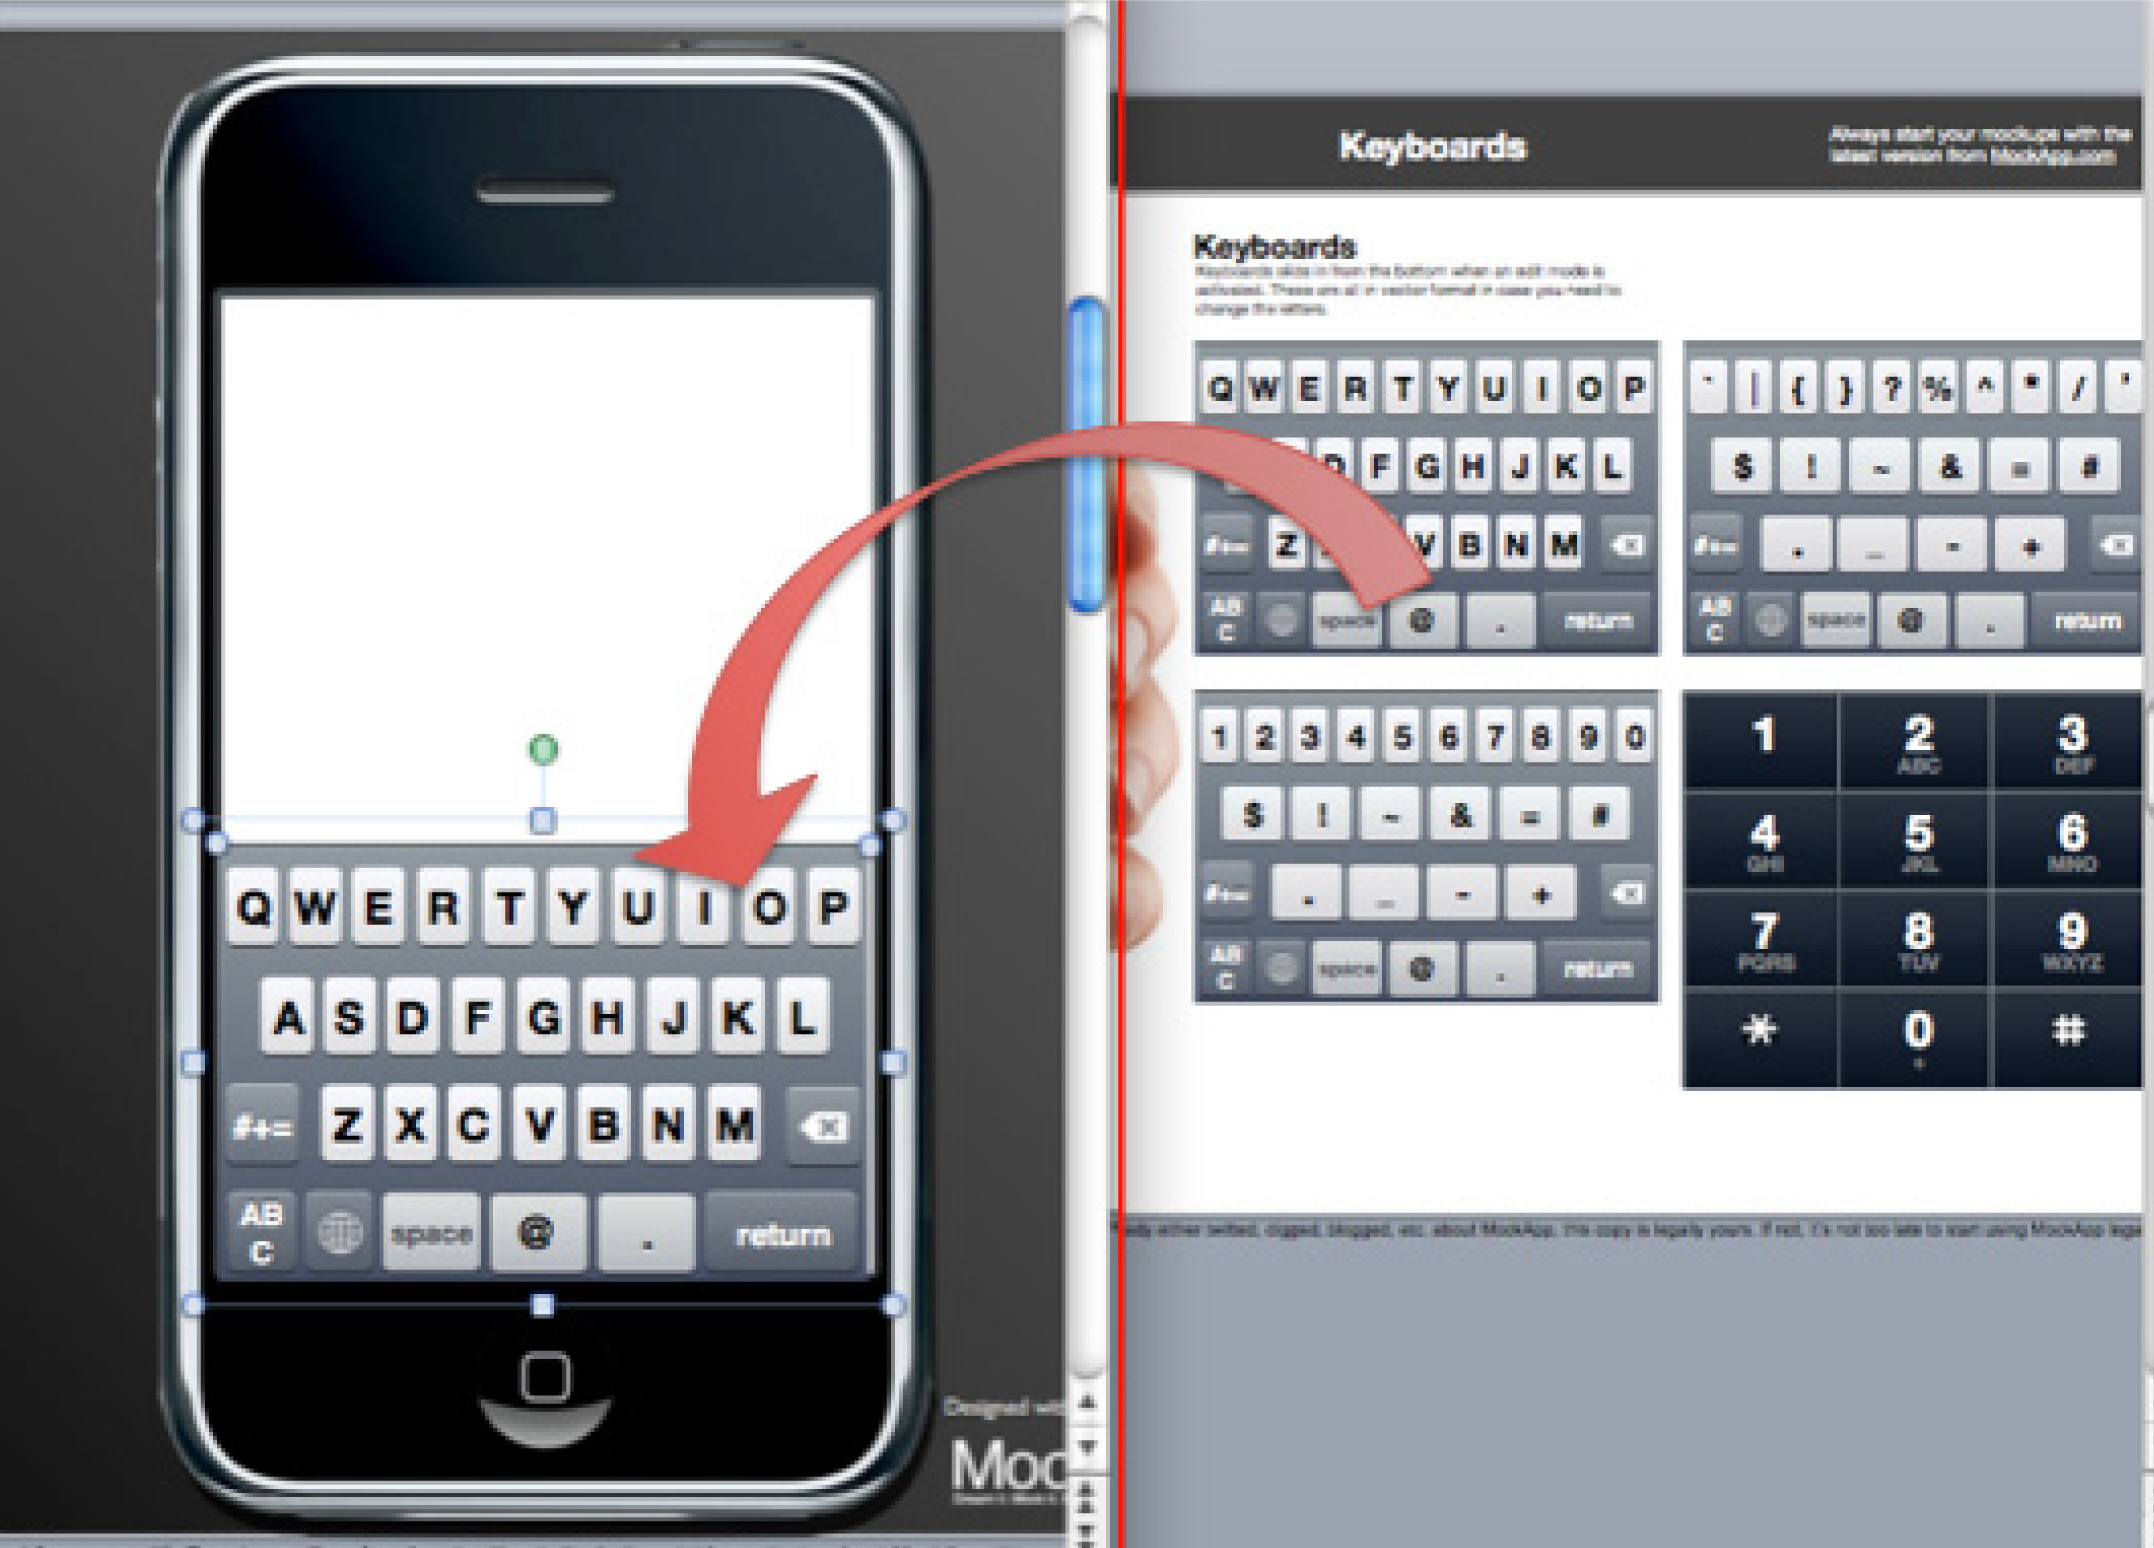
The MockApp template and library are depicted here opened simultaneously in overlapping windows. We recommend setting up in this way. The library consists of a series of PowerPoint slides each having an array of iPhone screen elements. The library slide shown here is for keyboards—but there are many other library slides. Copy elements off any of these library slides and paste them into the blank iPhone template. Then customize the text to suit your app. MockApp.com screen shot reprinted with permission from Dotan Saguy.
Key Takeaways
- Process flows help to plan your app by creating a high level overview of functionality.
- Thankfully, the iPhone has enforced interface standards. Knowing what required elements go where frees the designer to focus on the content of the app.
- The four major parts of the iPhone interface are the status bar, the navigation bar, the activity indicator, and the tab bar.
Questions and Exercises
- Describe the content and screen elements that you would expect to see in an app that monitored multiple vital signs such as temperature, heart rate, blood glucose, and so forth?
Techniques
The following techniques, found in the PowerPoint section of the software reference, may be useful in completing the assignments for this chapter. iPhone Interface Map • Hyperlink • Shape-Insert
L1 Assignment: A Market and Persona for Your App
When brainstorming iPhone Apps it is sometimes helpful to look at other apps already developed. The best way to check out other apps is on the iTunes store (iTunes is free). However, even if you do not have iTunes loaded, you can check out apps at the following link: http://app-store.appspot.com/
We can not overstate the importance of the assignments in this chapter. The rest of the course will build on what you create here. Your app will be viewed by your classmates so make it something you can be proud of.
Your classmates will “buy” your app in a future assignment, so the app needs to appeal to them either for their own consumption or to be given as a gift. You will also construct financial projections for your app in a future chapter. Finally, your report at the end of the course will be a culmination of all the deliverables you have constructed about your app to that point.
Setup
Start a blank PowerPoint presentation. Using a 12 point font, complete the following exercise using complete sentences and paragraphs.
Content and Style
- In one or more paragraphs describe the situation or problem that your app is designed to address. Note that you are not limited by technological constraints. Your app can have superpowers.
- In one or more paragraphs describe your solution to the situation or problem.
- In one or more paragraphs list at least three benefits that your solution will provide. You may use bullets.
- Describe three market segments that would buy your app—one of which must be your classmates. Provide demographics for the market segments—e.g., age, education, household income, gender, geographic location, and so forth.
- Now pick one of those segments and create a fictional persona in the target market. Tell us details about your persona—where they live, how much they earn, where they go on vacation, if they have a girlfriend/boyfriend, and so forth. Remember that your persona must be willing to buy the app.
Deliverables
Electronic submission: Submit a PowerPoint file containing your responses.
Paper submission: Print out your responses.
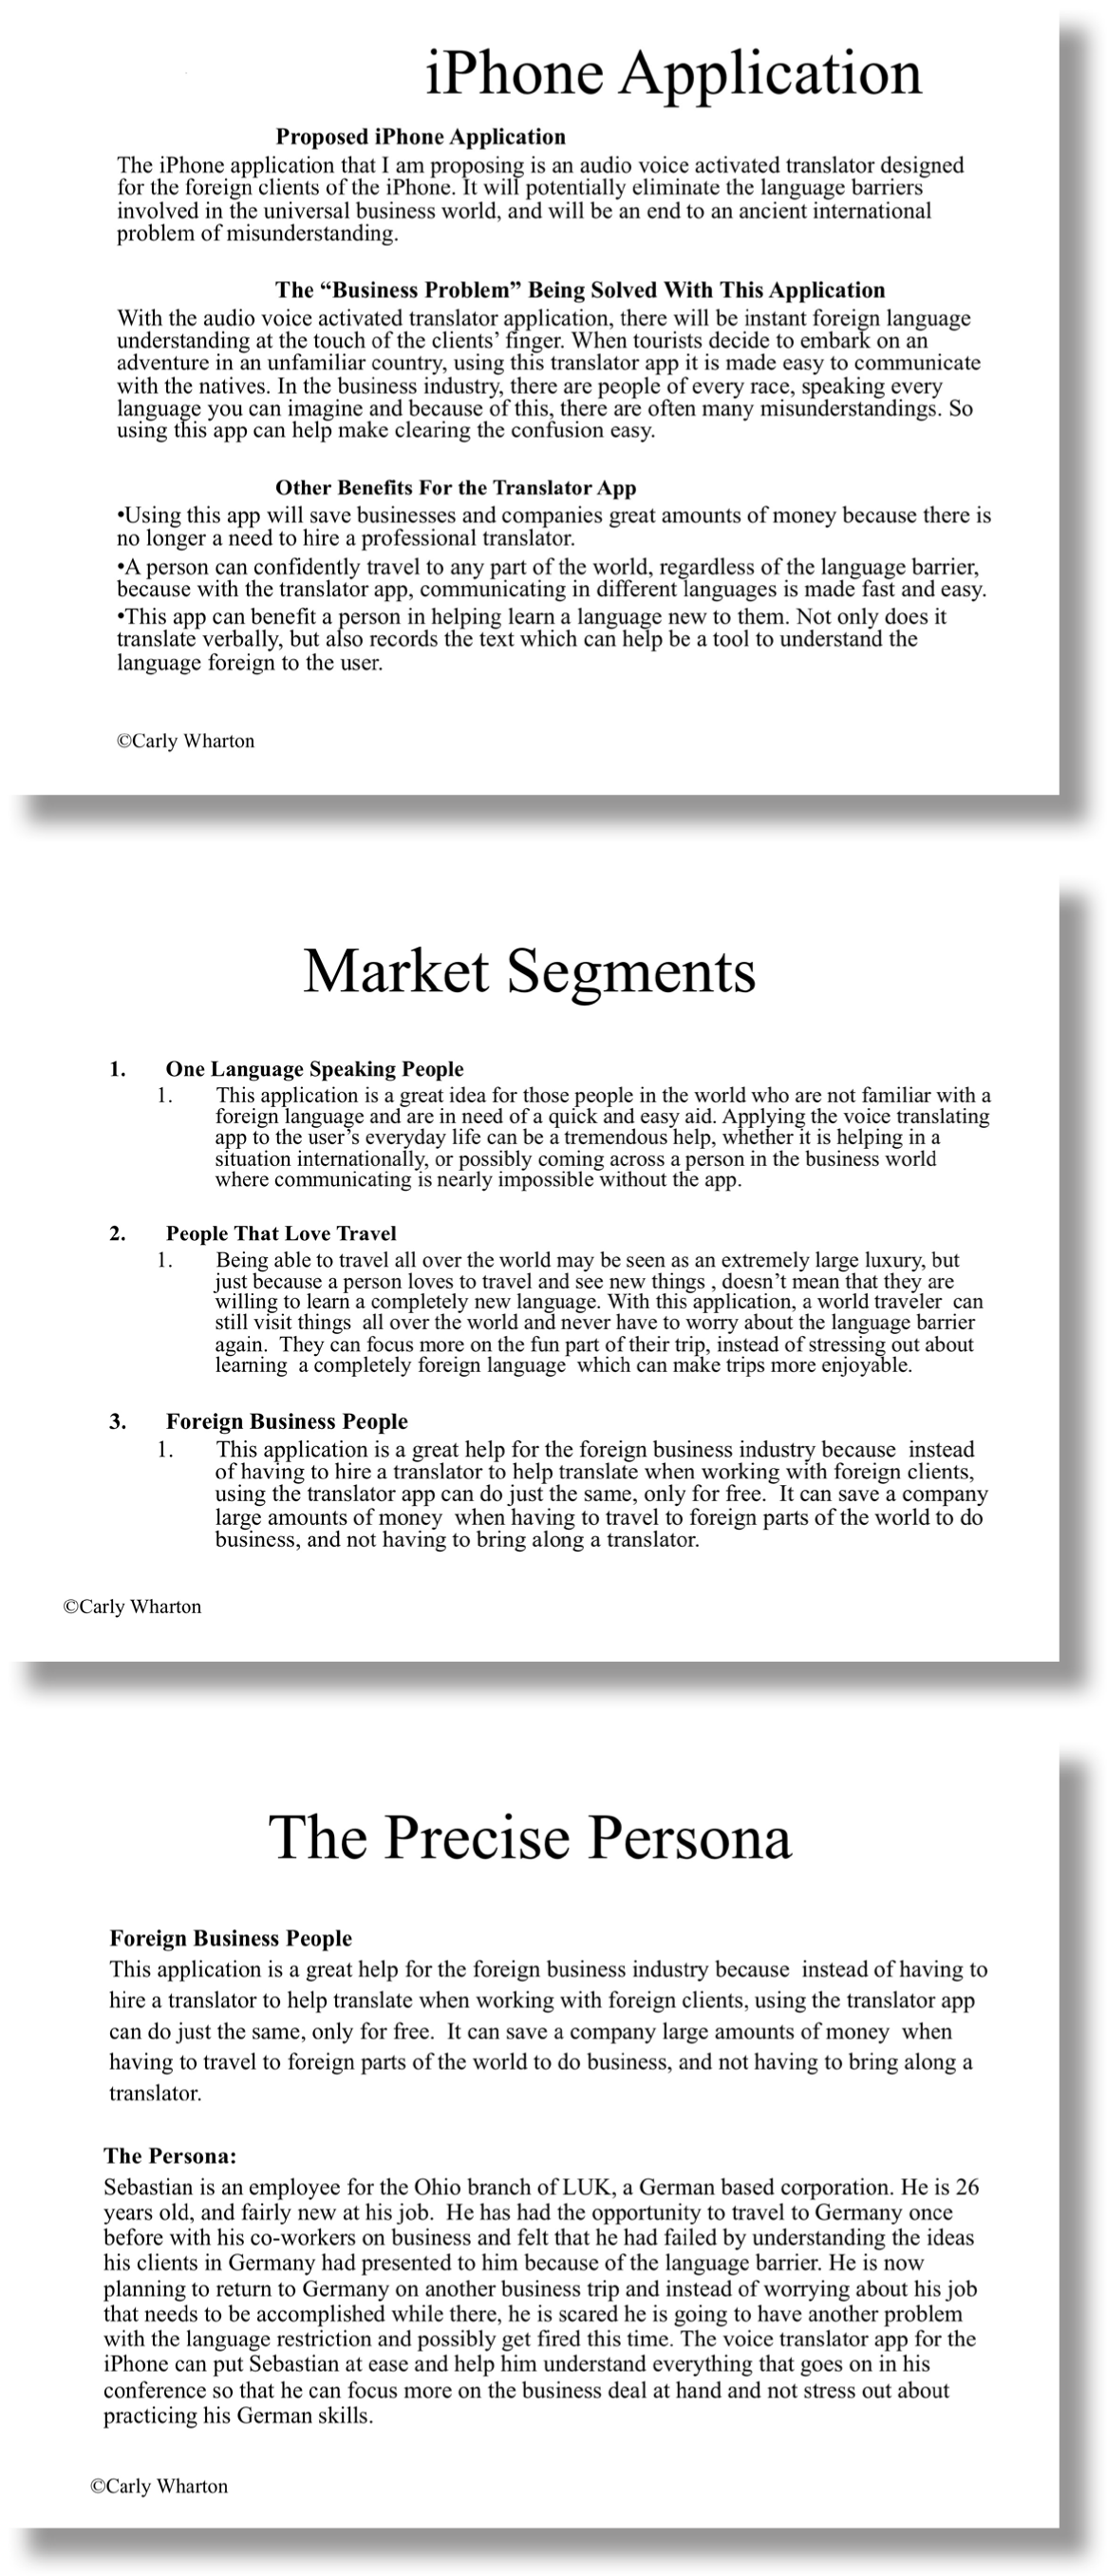
A sample student write-up for the L1 exercise. You Translate is an app that does translation. You should make your own original example.
L2 Assignment: Demonstrate the Benefits of Your App
By creating As-Is and To-Be process flow diagrams, you will be able to analyze the benefits of the app. Here you show us how your persona engages in a business process with, and without, your app. The app should build a strong case that the To-Be process is a significant improvement over the as-is version. Create both the As-Is and the To-Be process flow diagrams of the use of the iPhone app. The As-Is diagrams should model how the persona performs the task without the app. The To-Be diagram will describe how the task is completed using the app.
Setup
Start a blank PowerPoint presentation. Using a 12 point font, complete the following exercise using complete sentences and paragraphs.
Content and Style
- Create each process diagram on separate slides.
- Use a combination of drawing shapes (lines, arrows, etc.) and text.
- Use design principles to maximize professionalism.
- Label each diagram with an appropriate title and your name.
Deliverables
Electronic submission: Submit your PowerPoint file.
Paper submission: Create a color printout by printing directly from PowerPoint.
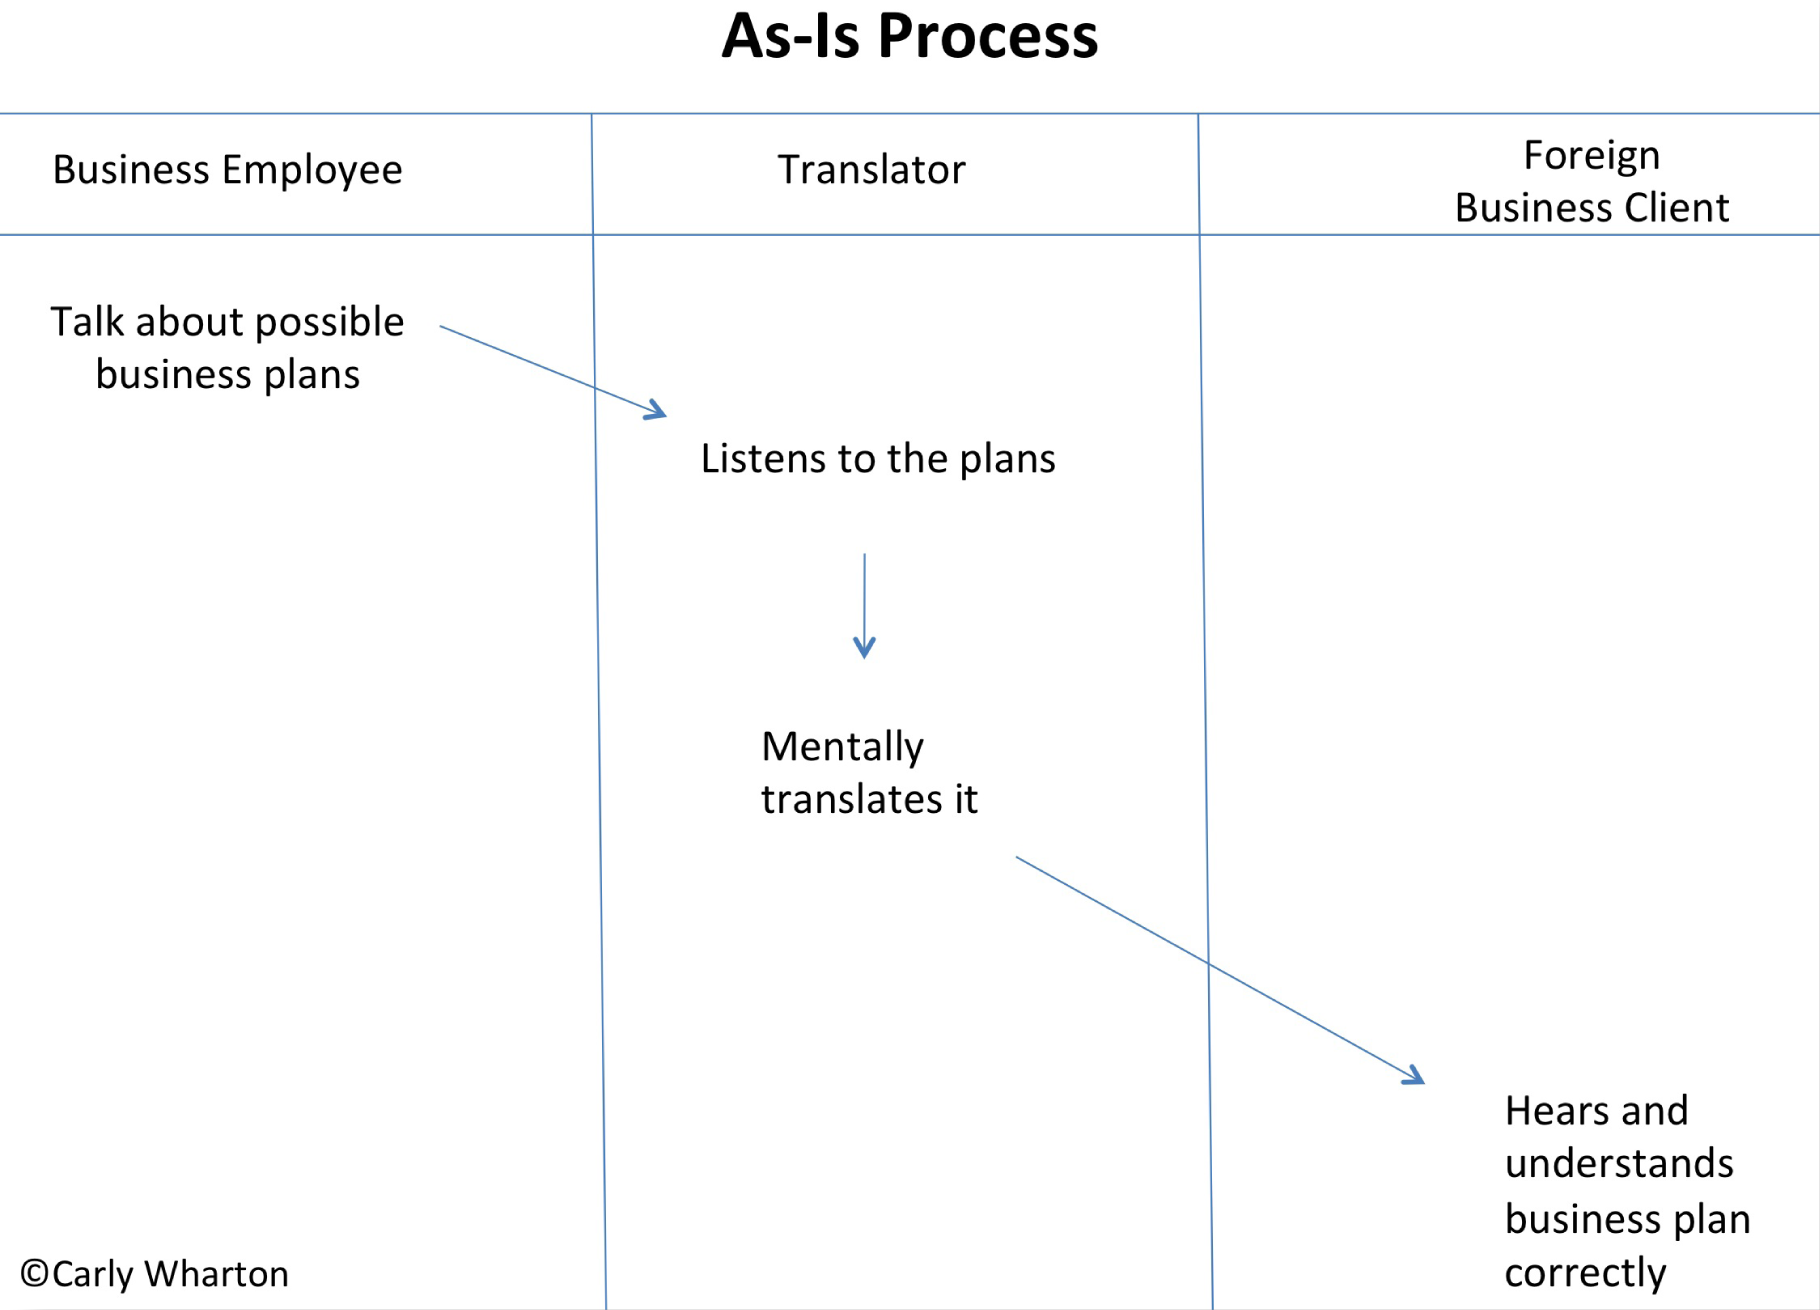
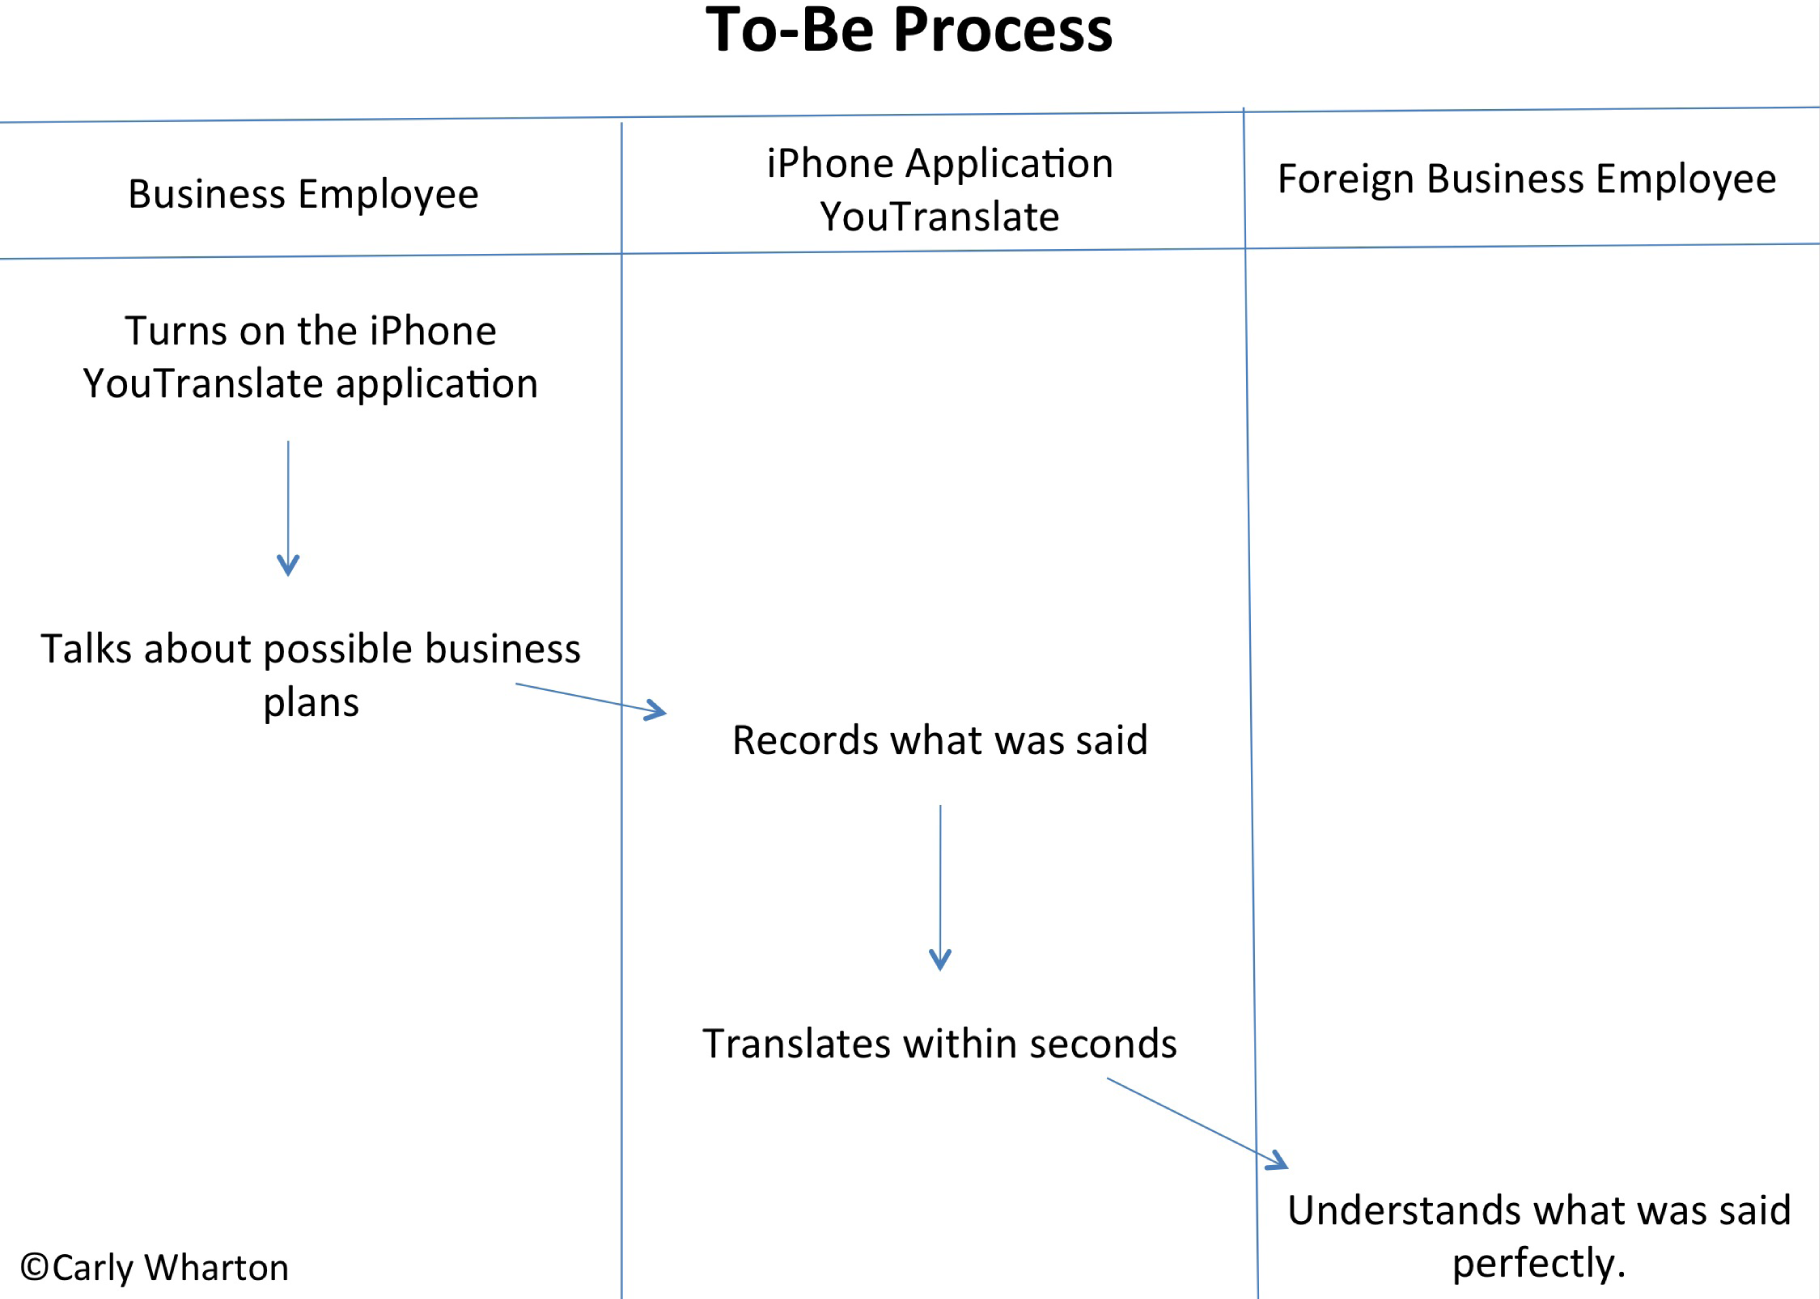
Sample student process flows for the You Translate app. You should make your own original process flows to match your app.
L3 Assignment: Create a Mockup of Your App
In this assignment you will create an iPhone app mockup based on your analysis. PowerPoint allows you to create a mockup of an application before doing any coding. This mockup acts as a visual model to use in a product proposal. Using the templates provided, design a creative and useful iPhone app.
Setup
Complete the free registration to obtain the files to design your app from MockApp.com. MockApp contains three files—the library of icons used by an iPhone app, and two templates—one that allows you to demo in PowerPoint and one that allows you to demo on an iPhone. You will use the one that allows you to demo in PowerPoint. Note that Mac users can also choose the Keynote versions of the MockApp files.
Build your app in the MockApp template file. Do not build your app in the same file that you used for either the L1 or L2 assignments. The dimensions of the PowerPoint files are different and your images will distort.
Content and Style
- Use the images given to recreate an original mockup.
- The mockup must contain at least six slides.
- Create an icon for your app with an appropriate logo on the first slide.
- Apply and follow all graphic design principles.
- Include all of the necessary images.
- Create hyperlinks between your PowerPoint pages to simulate the app in action. You should build hyperlinks off of the buttons, not the text on the buttons. (Otherwise the text will be underlined, which does not look right).
- Include your name as the wireless carrier instead of AT&T (in upper left corner).
Deliverables
Electronic submission: Save and submit your PowerPoint file.
Paper submission: Create a color printout by printing directly from PowerPoint.
Sample screen shots for the You Translate app. You should make your own original screen shots using the MockApp template and library.